DIY Bed Canopy
Hey Friends!
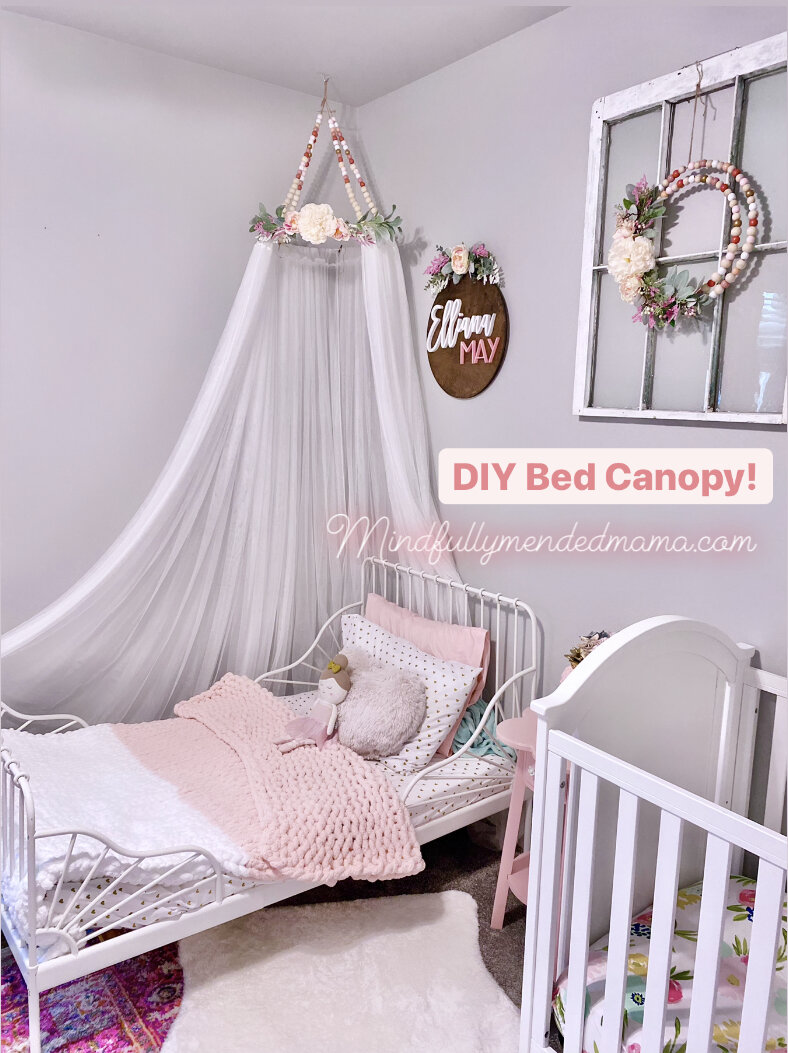
Happy Monday!! I hope you guys had an amazing weekend!! I posted a little sneak peak to Ellie’s big girl bed makeover on my instagram and many of you wanted the details on how I created the canopy!! I had been looking for a bed canopy for Ellie’s bed for a while and all of them that I found were incredibly expensive. I got frustrated enough that a creative bug was born! I found these curtains from Ikea that I had used for their closet in the playroom and I thought that they were perfect! One thing led to another and I built this thing for under 50$!!
Heres how!! **Look for 50% off sales for the things at Hobby Lobby. Everything I bought was on sale.

Metal Ring (this was the size I used… make sure you measure your space and pic the size that best fits your space! I would recommend seeing the ring in person before you buy it to make sure it’s the size you want!)
Curtains ( I purchased two packages. Each package has a set of two, so my canopy had 4 panels on it. Adjust accordingly depending on how full you want your canopy to be!)
Glue (I also used a hot glue gun for the floral)
Beads / Wood beads (I used small and large beads. They were what I had in the house!)
Floral tape- any craft store has this!
Floral- I chose a bundle from Hobby Lobby that went with my color scheme!!( Again, wait till floral is half off.. you’ll thank me later!)
Step One. Find the joint on the metal ring. Bend it back and forth until it breaks!! It will feel like you’re not supposed to be breaking it, it will eventually give so keep on bending it!

Step Two: Open the curtains. I purchased to packages because each package has a set of two. Which mean that I had four panels on my ring. If you want it to be fuller or less full, adjust accordingly!
Step Three: Ounce the curtains are on the ring I placed a couple wood beads on either side of the ring. I then took some floral tape and placed a big dot of glue on it. I rested the two ends of the metal ring together in the glue on top of the tape. I also added another drop once it was resting on the tape just for my peace of mind. If you check it the next day and it’s not holding you can always add more glue. The first time I did this I had to add more, it was frustrating but in the end I am glad I did. **Important: the more glue you use the longer it needs to dry! I let mine dry for almost 36 hours. Once you feel it is completely dry, I wrapped the remaining floral tape around the glued joint to secure it further and secure it more with a wood bead. I will then use the wooden bead as an anchor for some of the floral. This is not a requirement and can be done without the beads, I just liked the look of it and it was easier for me.

Step Four: Build your arrangement! This will take your imagination. Build it patiently. Also, make sure that your arrangement looks good from the right angle. It will be up in the air so adjust accordingly. Make sure that you can see it from the ground just the way you want! Glue gun, floral tape and wire are your new besties for this. Start small and for your way up. I glued the flower buds last after I had established the base of the arrangements. Every new stem I added I hot glued and wrapped with floral tape. If your stem is longer, you might want to tape the inner part of the upper stem to the ring so it doesn’t stick out near the curtain, unless you are going for that look!


Step Five: While that glue was drying I beaded the twine to hang it from the ceiling. This is also up to you if you want to add the beads/what color you use. I found the cutest beads and I guesstimated how long they would need to be. I used for pieces of strings so the ring would hang evenly. Once I beaded them I tied them all together into a slip knot. Where you choose to tie the twin onto the ring depends on how you want the curtains to be separated.

That is all!! I hope that this was helpful!! If you have any questions feel free to add them below or message me on instagram! If you end up using this, please tag me in your final projects!! I would love to see them!!
(@mindfullymendedmama )
Have a beautiful week babes!!
XOXO, KB